
VR: Virtual Reality- Equipment & Safety
Wearing the Headset
If you experience nausea or dizziness while using the headset, let the VR attendee know right away.
Turning on the Headset and Putting on Your Head
- Press the power button on the right side of the Oculus Quest Headset. After pressing it, the button should emit a white light. If the button emits a red light, it needs to be charged using the charging cable.
-
Before putting on the headset, turn the knob on the back of the elite strap to the left and loosen the velcro at the top of the headset.

-
To put on the headset, place the headset on your eyes. If you are wearing glasses, make sure to wear the headset front first. Secure the velcro strap and then tighten the headset by turning the knob to the right. You will hear a clicking as the headset tightens.
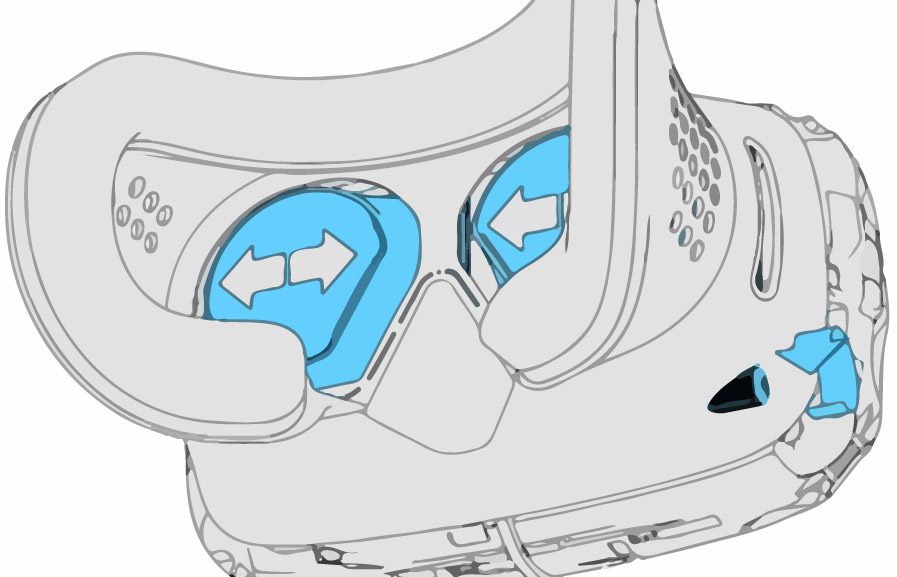
Adjusting the Lens Spacing
If you find that you need that the image is blurry, you may need to adjust the lens spacing. Remove the headset. You may adjust the lens spacing for your IPD (inter pupillary distance) by moving the lens to the left or the right. As you adjust the lens, you will will notice that the number at the top of the lens will change to 1, 2, or 3.
Consult the following video for more information: https://www.youtube.com/embed/oYs7_RC2cUc
Adjusting the Volume
You can change the volume by pressing the volume button on the bottom right area underneath the headset.
